Boston Cream Cake Recipe: A Delicious American Classic
Boston Cream Cake Recipe is one of those timeless American desserts that stands out not only for its divine flavor but also for its versatility and history. Made up of three distinct layers—fluffy sponge cake, smooth vanilla custard filling, and a rich chocolate ganache—this dessert has won the hearts of cake lovers worldwide. If you’ve ever had the pleasure of savoring this dessert, you already know how indulgent it is. But making it at home is even more rewarding!
In this article, we’ll take you step by step through the process of making a mouthwatering Boston Cream Cake. We will also dive into the history of this beloved dessert, explore its key ingredients, share expert tips, and even suggest creative twists to make your cake unique.
Learn about the history of Boston Cream Cake and its origins at The Boston Day Book
The History of Boston Cream Cake Recipe
Boston Cream Cake’s origins date back to the mid-19th century in Boston, Massachusetts. Originally called the Boston Cream Pie, it was first created in 1856 by a French chef, M. Sanzian, at the famed Parker House Hotel in Boston. The dessert was made by mistake when the chef placed two layers of sponge cake filled with custard and topped with chocolate glaze.
Despite its name, Boston Cream Pie is not a pie at all, but a cake! This clever name came from the use of a pie tin for the original recipe. Over time, the Boston Cream Pie evolved, and by the 1990s, it was transformed into what we now know as Boston Cream Cake. In 1996, the dessert was officially declared the state dessert of Massachusetts, a fitting tribute to this cake’s cultural significance.
Explore the rich history of Boston Cream Cake and other iconic Boston desserts here
Key Components of Boston Cream Cake
Before we dive into the specifics of the recipe, it’s helpful to understand the three essential components that make up the Boston Cream Cake Recipe. Each part plays a crucial role in ensuring that the final product is a delicious, balanced dessert. Here’s a breakdown:
- Sponge Cake Layers: The sponge cake is light, airy, and fluffy, providing a delicate base for the richer custard and ganache. The cake’s tender texture is achieved by folding in air during the mixing process, which allows it to rise evenly in the oven without the use of chemical leavening agents. This ensures that the cake remains soft and moist but sturdy enough to hold the custard and ganache.
- Vanilla Custard Filling: The vanilla custard is the star of this cake. Made from egg yolks, milk, sugar, and a touch of vanilla extract, this filling is what gives the cake its creamy, indulgent flavor. The custard can be a bit tricky to make, as it requires careful attention to avoid curdling. However, once made, it’s perfectly sweet and thick, balancing the richness of the sponge cake and the chocolate ganache.
- Chocolate Ganache Topping: The final layer is the chocolate ganache, which provides the cake with its luscious, glossy topping. Made by combining heavy cream with dark chocolate, the ganache creates a velvety smooth finish that sets perfectly when chilled. The combination of rich chocolate and whipped cream gives the ganache a deep, sophisticated flavor that complements the sweetness of the custard and adds a beautiful shine to the finished cake.
Ingredients for Boston Cream Cake
The following ingredients will be used for each component of the cake. While the list may seem lengthy, each element is essential for achieving the signature flavor and texture of this dessert.
For the Sponge Cake:
- 1 ½ cups all-purpose flour
- 1 cup granulated sugar
- 1 teaspoon baking powder
- ½ teaspoon baking soda
- ¼ teaspoon salt
- ¾ cup buttermilk
- ¼ cup vegetable oil
- 2 large eggs
- 1 teaspoon pure vanilla extract
For the Vanilla Custard Filling:
- 2 cups half-and-half (or whole milk)
- 4 egg yolks
- ¾ cup granulated sugar
- ¼ cup cornstarch
- 2 tablespoons unsalted butter
- 1 teaspoon pure vanilla extract
For the Chocolate Ganache:
- 1 cup heavy whipping cream
- 8 ounces dark chocolate (semisweet or bittersweet)
Step-by-Step Instructions for Boston Cream Cake
1. Preparing the Sponge Cake
- Preheat the oven to 350°F (175°C) and prepare two 9-inch round cake pans by greasing them with butter and lining the bottoms with parchment paper.
- In a large bowl, sift together the flour, sugar, baking powder, baking soda, and salt. This step ensures that all dry ingredients are evenly distributed.
- In a separate bowl, whisk the buttermilk, vegetable oil, eggs, and vanilla extract until smooth. The liquid ingredients should be combined thoroughly for optimal flavor.
- Gradually add the wet ingredients to the dry ingredients, mixing gently until just combined. Be careful not to overmix, as this could result in a denser cake.
- Pour the batter evenly into the prepared cake pans and use a spatula to smooth the tops.
- Bake for 25-30 minutes or until a toothpick inserted into the center of the cake comes out clean. Every oven is different, so start checking around 20 minutes to avoid overbaking.
- Let the cakes cool in the pans for about 10 minutes before transferring them to a wire rack to cool completely.
2. Making the Vanilla Custard Filling
- In a medium saucepan, heat the half-and-half over medium heat until it begins to simmer. Don’t let it boil, as this can affect the texture of the custard.
- In a separate bowl, whisk the egg yolks and sugar together until smooth and pale in color. Add the cornstarch to the mixture, whisking it in fully.
- Slowly pour a small amount of the hot half-and-half into the egg mixture, whisking constantly to temper the eggs and prevent them from scrambling.
- Gradually pour in the rest of the half-and-half while continuing to whisk.
- Return the mixture to the saucepan and cook over low heat, whisking constantly until it thickens to a custard-like consistency. This process should take around 3-5 minutes.
- Remove the custard from the heat and stir in the butter and vanilla extract. Let it cool to room temperature before using it to fill the cake layers.
3. Making the Chocolate Ganache
- In a saucepan, heat the heavy whipping cream over medium heat until it begins to simmer. Once you see bubbles forming around the edges, remove it from the heat.
- Pour the hot cream over the chopped dark chocolate and let it sit for about 1 minute. This allows the chocolate to melt slowly and evenly.
- Stir the cream and chocolate together until smooth and glossy. If you prefer a thicker ganache, let it sit and cool for a few minutes to achieve your desired consistency.
- Let the ganache cool slightly before pouring it over the cake to prevent it from running too much.
4. Assembling the Cake
- Once the cakes have cooled, level the tops if necessary. You can use a serrated knife or cake leveler to ensure even layers.
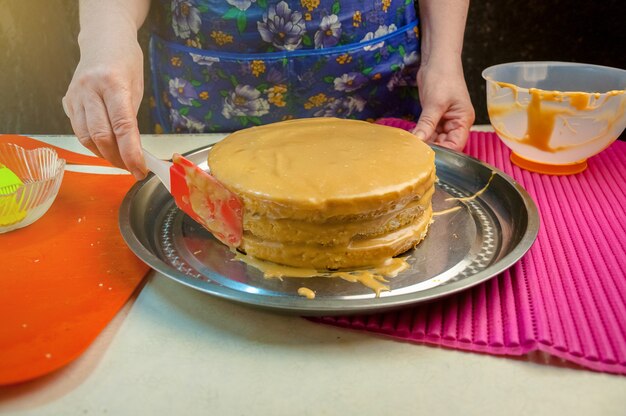
- Place the first cake layer on a serving plate. Spread a generous layer of the cooled vanilla custard filling evenly over the cake.
- Carefully place the second layer of cake on top and press down gently.
- Pour the cooled chocolate ganache over the top of the cake, allowing it to drip down the sides and cover the top entirely.
- Chill the cake in the refrigerator for at least an hour to allow the ganache to set properly.
Tips for Success
- Room temperature ingredients: Ensure that your eggs, buttermilk, and butter are at room temperature for the best results. Cold ingredients can cause the batter to clump together and affect the texture.
- Don’t rush the custard: When making the vanilla custard filling, take your time. Make sure to constantly whisk the mixture to avoid lumps or curdling. Low and slow is key.
- Cool the cake layers completely: If you assemble the cake while the layers are still warm, the custard and ganache can melt. Let the cake layers cool completely before filling and frosting.
- Chill the cake: After assembling, make sure to chill the cake in the refrigerator for at least an hour. This helps the custard set and the ganache harden to the perfect consistency.
Variations and Creative Twists
Boston Cream Cake is delicious in its traditional form, but that doesn’t mean you can’t get creative. Here are a few variations to try:
- Add liqueur to the ganache: For an extra sophisticated touch, add a splash of Grand Marnier, Kahlua, or Bailey’s Irish Cream to the chocolate ganache. The liqueur will elevate the flavor of the ganache and complement the sweetness of the custard.
- Fruit variations: Incorporate fresh berries, such as raspberries or strawberries, between the layers of cake for a fruity contrast. The tartness of the fruit balances the richness of the custard and ganache.
- Different types of chocolate: Experiment with white chocolate, milk chocolate, or even caramel ganache for a unique twist on this classic recipe.
- Nutty texture: Try adding a layer of chopped nuts, such as hazelnuts, almonds, or pecans, for added texture and flavor. You can either fold them into the batter or sprinkle them on top of the ganache.
Frequently Asked Questions (FAQs)
What is the difference between Boston Cream Cake and Boston Cream Pie?
Despite its name, Boston Cream Pie is technically a cake, not a pie! The term “pie” originated because the cake was initially baked in a pie tin. However, over time, the name evolved, and the dessert became more cake-like in appearance.
Can I make Boston Cream Cake ahead of time?
Yes, you can absolutely make the individual components ahead of time! Prepare the cake layers, custard filling, and ganache in advance, and store them in the refrigerator. Assemble the cake just before serving for the best texture.
How should I store leftovers?
Store any leftover cake in the refrigerator, covered with plastic wrap or an airtight container, for up to 3 days. The custard filling needs to be refrigerated to maintain freshness.
Can I freeze Boston Cream Cake?
Yes! If you want to make the cake ahead of time, you can freeze the cake layers without the custard and ganache. Wrap the layers tightly in plastic wrap and foil, and store them in the freezer for up to 2 months. Thaw in the refrigerator before assembling with the custard and ganache.
Explore other delicious cake recipes like Easy Chocolate Crinkle Cake Mix Cookies
 Conclusion
Boston Cream Cake Recipe is a rich, flavorful dessert that brings together the best of classic American baking. With its fluffy cake layers, creamy custard filling, and shiny chocolate ganache, it’s sure to be a hit at any gathering. By following this step-by-step recipe, you can create a dessert that’s as delicious as it is impressive.

 Conclusion